Crash Course Anne co-op: a whole run in two chapters
No saferoom at the start; you land in the open. The alleys are full of alarmed cars, and the truck lot finale plays around a generator.
Learn the pace before the route
At a normal Anne co-op pace, you cover roughly 3% to 5% of the flow between waves. Treat a chapter as 100%: door to saferoom costs 20 to 30 waves.
Each chapter below is split by flow percentage. To see the spawns for a stretch, click the link at the end of that chapter. The visualizer loads the map and places the whole team at that progress.
c9m1 Alleys: form up before you move
There is no starting saferoom. The helicopter wreck is the start. Form up before you move; do not scatter to loot the moment you wake.
The first half is tight alleys and backyards with the Boomer band glued to you. Treat corners as occupied. Plenty of alarmed cars here: lighting one up is calling a wave on purpose. Check before you shoot and route around when you can.
The last 30% enters the warehouse area, and the shelving aisles spawn along their length. Do not greed the loot on the final two or three waves before the saferoom.
- Hold spots
- Clear waves in single-entrance backyards and storefronts; move through the warehouse shelving in pairs, never alone.
- Segment plan
- First 40% (~8 waves): form up after the crash landing, clear the alleys steadily, learn the alarmed cars. Middle (~7 waves): density stays even, keep the rhythm. Last 30% (~7 waves): the warehouse zone at 60–80% is the chapter peak — no greedy looting in the final waves.
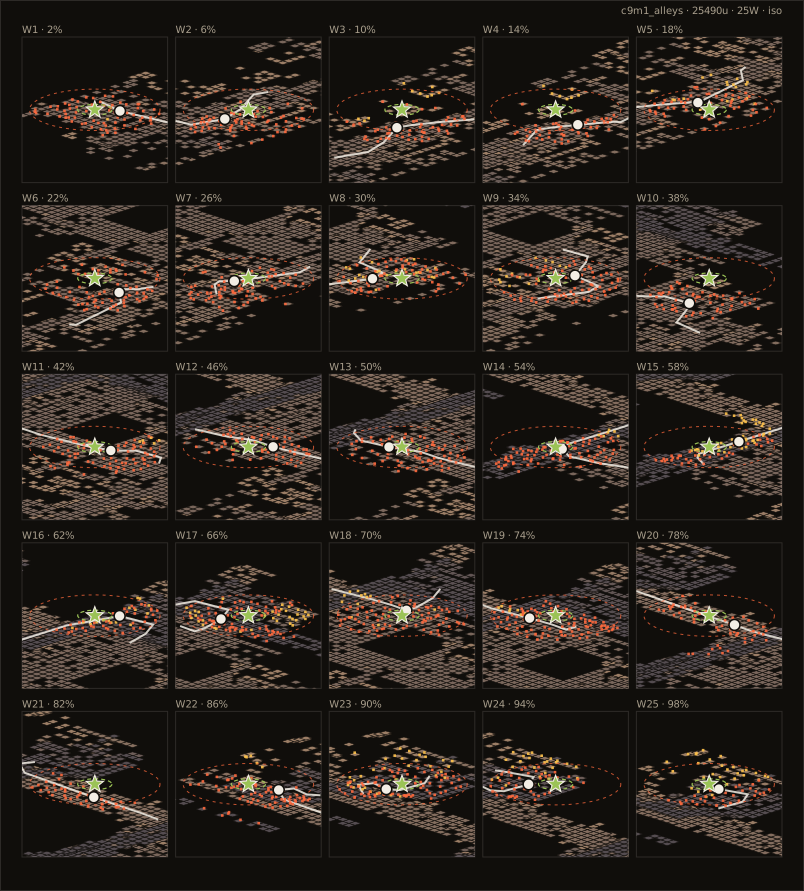
Open this chapter in the spawn visualizer
Explore this chapter interactively: drag survivors, scrub progress, and spawn waves in the live simulator
c9m2 Truck lot: the generator starts, the waves roll
The first 60% pushes through the truck lot. Under the trucks and in the beds are legal spawn spots. Do not cut through the middle of the lot; walk the edge.
The finale plays around the generator. Once it fires up the waves roll. Hold the perimeter without stacking: two on the front lane, two on the flank gaps. If the generator stalls, the restart runner is agreed in advance and everyone's fire follows him.
- Hold spots
- Split into two staggered pairs around the generator with truck beds at your backs; when someone moves to restart it, the guns move with them.
- Segment plan
- Push (~9 waves): the first 60% is evenly dense — walk the lot edge, never through the truck maze. Event: the generator yard is open on all sides, so the hold relies on staggering, not terrain. Endgame: guns track the restarter on the move, and everyone leaves together once the truck is down.
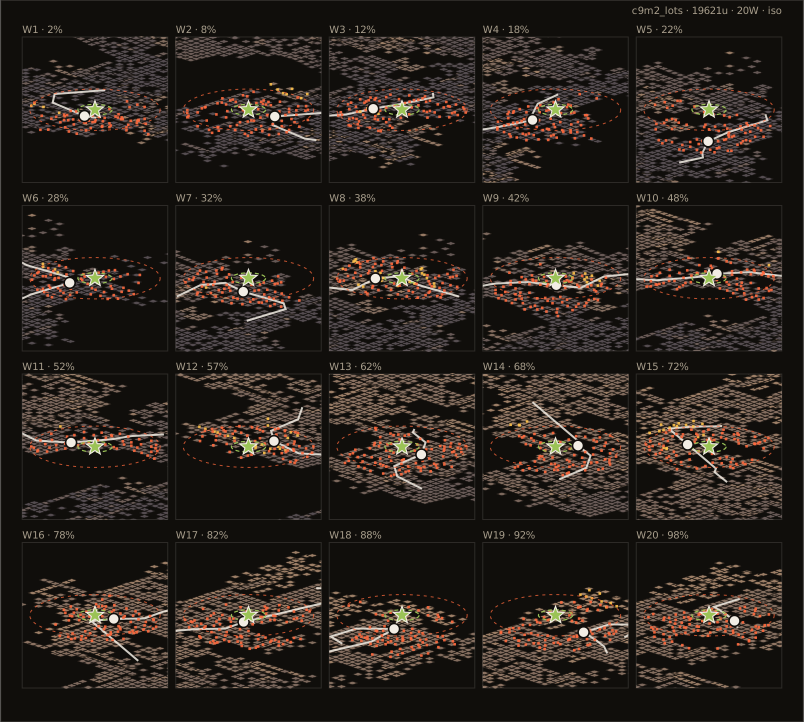
Open this chapter in the spawn visualizer
Explore this chapter interactively: drag survivors, scrub progress, and spawn waves in the live simulator
Alarm cars: this map's own headache
The alley section of Crash Course has one of the highest alarm-car densities of any official map, and experience from elsewhere is not enough here. It matters far more in AnneHappy than in vanilla: the horde an alarm pulls scatters the team, scattering trips the isolation check, and the next wave of specials follows immediately.
- Learn to spot them:Alarm cars have lights on the roof and a different body colour from ordinary ones. Glance before you shoot, and go around if you can.
- If you must set one off, position first:Find a yard or shopfront with a single entrance, get all four inside, then fire. Setting it off in an open alley means being hit from every side.
- Do not push during the horde:Clear it, then move. Fighting while backing up is the fastest way to stretch the team into a line.
- Hold the molotov:Handle the horde with a pipe bomb or with positioning, and save the gas for the Tank at the truck depot later.
Across both chapters there are only two saferooms and no supply point to count on in between. Hold back anything you can spare in the first half and bank it for the truck-depot rescue.
Budgeting supplies for a two-chapter campaign
Most campaigns run four or five chapters, so you can spend one chapter's worth and restock in the next. Crash Course has only two, and no saferoom at the start — what you land with is what you have.
Two practical consequences. First, the few minutes of scavenging after landing matter: splitting four ways is fast but dangerous, so pair up and take opposite sides of the same alley. Second, the c9m1 saferoom is your only chance to re-equip the whole run, so level out everyone's health, ammo and throwables before you open the door.
The generator rescue at the truck depot is where most of the run's supplies go. Ideally you enter c9m2 with at least one throwable each and two medkits for the team. If you fall short, play the push section frugally.