Dead Center Anne Co-op: Hotel to Atrium
Down the burning hotel, the cola run at the gun shop, the mall alarm gate, the fueling finale in the atrium. Route knowledge is not the hard part.
c1 in Anne co-op
There are plenty of route guides online. In Anne co-op the hard parts are the directions SI come from legal Nav spots, plus this campaign chains three events — the cola run, the alarm gate, the fueling finale — each forcing you to work inside the wave rhythm.
Boomer preferred 250 to 550. Treat a door as occupied. Smoker minimum 500. Hunter 350 to 950, which covers hallways and opposite balconies.
Estimate waves at 3% to 5% of progress each: the first three c1 chapters are short, so budget roughly fifteen to twenty waves per chapter. During events Flow barely rises while waves keep coming, which means eating extra waves in place. Drag the spawn visualizer progress to the spot you plan to hold and you can see the legal spawn points for that stretch.
Open this chapter in the spawn visualizer
Explore this chapter interactively: drag survivors, scrub progress, and spawn waves in the live simulator
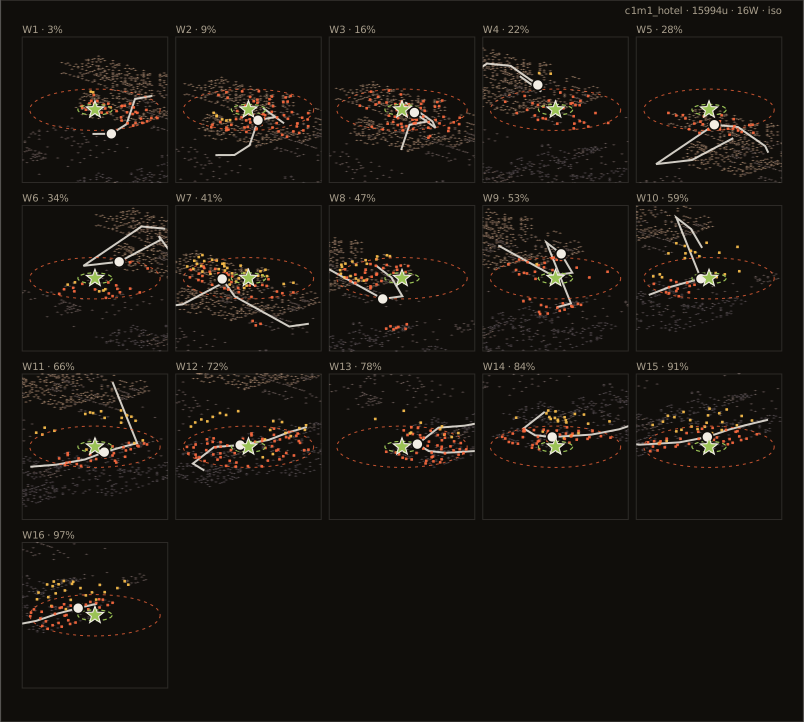
c1m1 Hotel: a burning building of vertical spawns
The whole chapter is a descent through a burning hotel; smoke and fire cut the corridors into segments and the walkable path is narrow. Stop on a stairwell to reload and SI spawn one floor up or down; Smoker gets the high-ground discount, and walkway rails suit it well. Do not stack four people on the same flight of stairs.
Sightlines are bad in the smoke. Nobody should wander into side rooms to loot alone — past 800 spread the team counts as two groups. Regroup at the door before stepping onto the street: one person out with three still inside keeps Flow counted as stalled.
- Wave budget
- A short chapter — at normal pace you reach the saferoom in about fifteen waves. Budget supplies for that and do not linger in the building.
- Hold spots
- A just-cleared corner room between stair landings: one door facing out, a fire-sealed corridor at your back, so nobody has to watch behind.
- Segment plan
- First 30% (~4 waves): high points light up around the start floors — clear the upper walkway before descending. 30–60% (~5 waves): high points cluster again around 40–50%, so keep looking up across floors. Last 40% (~5 waves): density drops; regroup in the lobby before the exit.
c1m2 Streets and the gun shop: the cola run is the main event
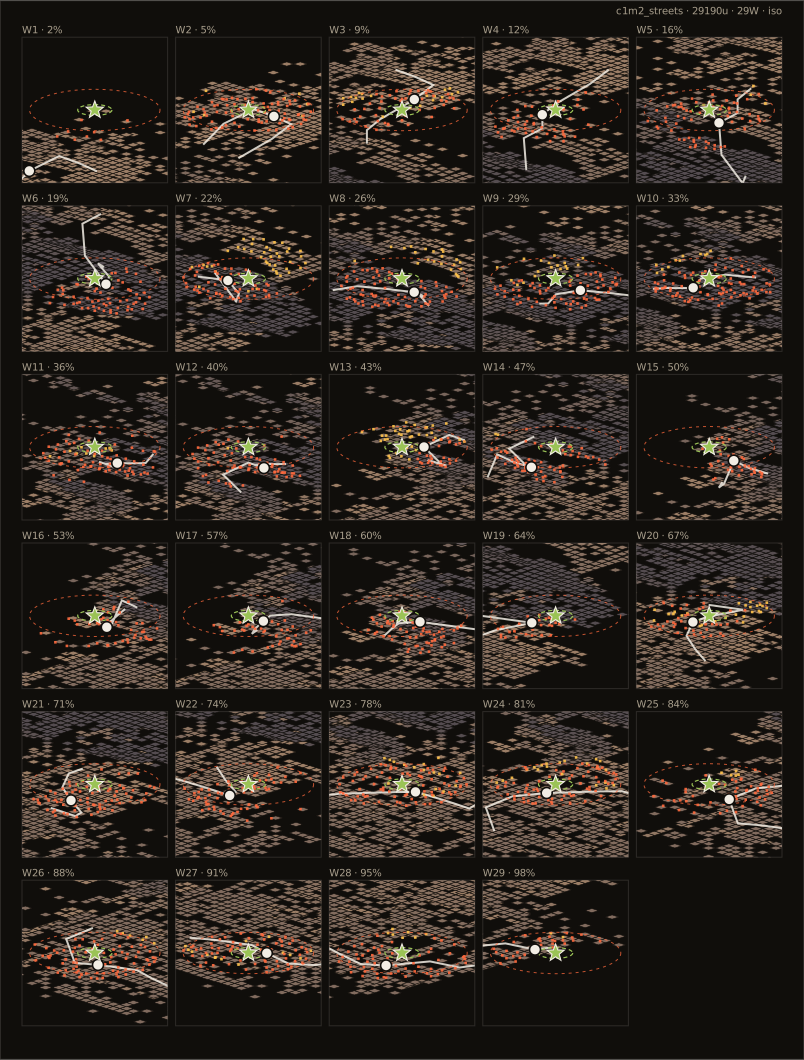
The street is wide; four abreast easily passes 800 spread. Lead hugs one building line, rear stays back on the other side. When grabbing guns upstairs in the shop, do not take the whole team up — leave two watching the street.
The cola delivery for Whitaker is an alarm event: the carrier cannot shoot, so the other three clear around them. Top off health and ammo before starting, agree who carries and which side you return on. The 16-second timeline keeps running while the alarm blares — one down is very hard to pick back up.
After the tanker blows, do not rush the gap. Clear the horde the explosion pulled first, then cross together.
- Wave budget
- Around twenty waves. Flow does not move during the cola round trip while horde and waves come together, so budget two or three extra.
- Hold spots
- The gun shop upstairs has a single staircase up — the steadiest hold in the chapter. You can fall back to it to clear waves before and after the cola run.
- Segment plan
- First 30% (~6 waves): buildings on both sides are spawn-dense around 20–30%, cross in a diagonal. Middle (~8 waves): gun shop plus the cola run — clear the 40–50% second-floor high points before starting. Last 40% (~7 waves): another dense band at 70–80% past the tanker gap, so do not rush through.
Open this chapter in the spawn visualizer
Explore this chapter interactively: drag survivors, scrub progress, and spawn waves in the live simulator
c1m3 Mall: assemble before the alarm gate
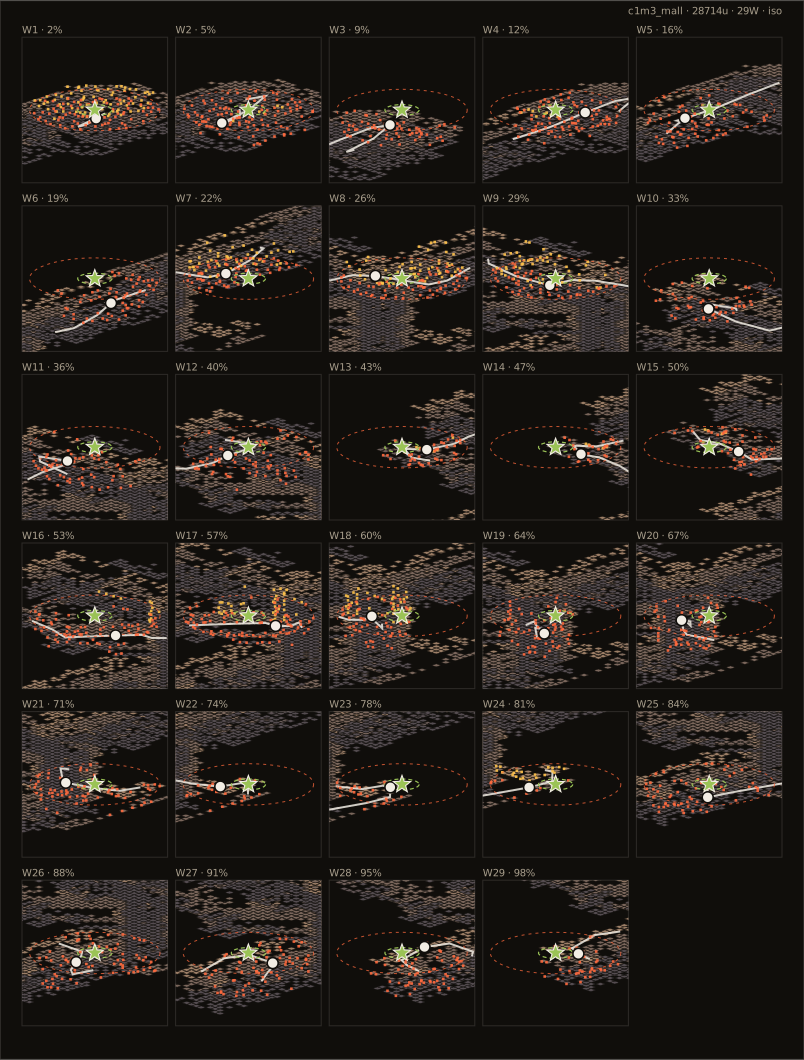
You walk the first floor while Smoker and Hunter sit behind second-floor rails; the high-ground discount puts those spots into scoring. Two on the escalator with two below counts as two groups — go up together, or the people below call a stop.
The CEDA checkpoint alarm gate rings the moment you push it, and the switch is half a mall away. Stack the whole team at the door first and agree on a straight route — nobody detours into a store. Shut the alarm off, then come back for stragglers.
- Wave budget
- Around twenty waves; horde is nonstop while the alarm rings, so finish the run first and clean up after.
- Hold spots
- After the alarm stops, back into the nearest single-entrance store to clear stragglers instead of standing in the open atrium; regroup once more before the saferoom corridor.
- Segment plan
- Opening (~5 waves): the densest stretch of the whole map starts right at the saferoom — clear across floors before pushing. Middle (~8 waves): the alarm gate zone at 50–70% is high on both density and high points; empty the area before pushing the gate. Late (~7 waves): another high-point band on the 80–90% second-floor rails — look up and regroup before the saferoom corridor.
Open this chapter in the spawn visualizer
Explore this chapter interactively: drag survivors, scrub progress, and spawn waves in the live simulator
c1m4 Atrium: fueling is a hold
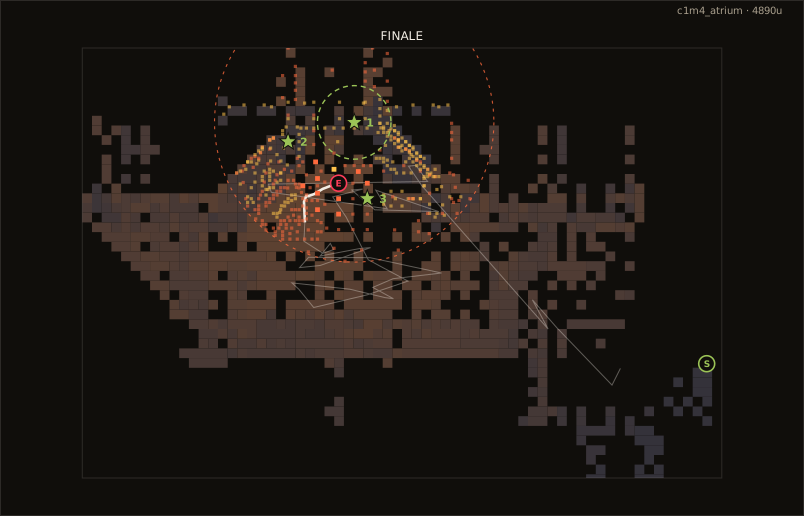
The finale is fueling Jimmy Gibbs' stock car. Cans are scattered across the atrium ground floor, second floor, and by the escalators; you carry one at a time, and pouring pins you at the car for seconds — exactly the window Hunter and Smoker want.
Do not have all four each carrying a can. Two run fuel while two hold at the car and under the second-floor rails clearing SI, then rotate. Tanks come on the finale rhythm — save oil and molotovs for them, not for horde piles.
The last few cans are where runs die: people rush, spread widens, throwables are spent. Better to lose a wave of time than to send the carrier to the far end alone.
- Wave budget
- The finale ignores Flow — waves follow fueling progress and do not stop until the tank is full. Expect at least two Tanks; keep oil and molotovs for them.
- Hold spots
- Between waves hold at the corner of the car podium with a pillar at your back; kite Tanks around the escalators and planters instead of brawling on the open atrium floor.
- Segment plan
- Setup: density is lowest in the opening 30%, so haul the nearby cans first. Rotation: candidates are densest around 60–80% (the far podium and second-floor rails) — hold the podium corner with a pillar at your back. Endgame: the last cans all sit inside the density peak; two escort one carrier, and losing a wave is fine.
Open this chapter in the spawn visualizer